
Steroid_Kit
Getting Started
Install Steroid Kit, configure a supported coding agent, and try local recall or a connected tool/flow.
What is Steroid Kit?
Steroid Kit is a unified developer toolkit that gives AI agents access to over 200 real-world integrations through a single, lightweight installation. It combines an MCP server layer for on-demand tool discovery, a visual workflow engine for deterministic automation, a secure secrets vault, and a CLI that wires everything together in one command.
| Product | What it does |
|---|---|
| Steroid MCP | Marketplace discovery/execution through search_tools and run_tool; the complete server exposes 3 Local / 9 Connected operations |
| Steroid Flows | Explicit visual or agent-built orchestration, with real execution tests and bounded repair |
| Steroid Vault | Local encrypted credential storage, separate execution credentials and encrypted AP Connections for agent-built flows |
| Steroid CLI | One-command install, update, and configuration management |
Setup
Steroid runs in one of two modes — Local or Connected. You install the CLI once, run steroid, pick a mode, and it wires up your IDE automatically. Installing does not require an account; only Connected mode does. See Local vs Connected Mode for the full comparison.
TIP
Have your IDE and (where it has one) its CLI installed before you start — e.g. for Cursor, check the agent CLI with agent --version. Steroid prompts you if something is missing during setup.
1. Install the Steroid CLI
Run the one-line installer for your platform, then restart your terminal.
macOS / Linux
curl -fsSL https://raw.githubusercontent.com/steroidkit/releases/main/install.sh | shWindows (PowerShell)
irm https://raw.githubusercontent.com/steroidkit/releases/main/install.ps1 | iex2. Open the Steroid CLI
Run steroid to launch the interactive TUI. On the first run it opens the mode picker — “How should Steroid run?” Pick a mode (arrow keys or click, then Continue); you can change it later in Settings.
Launch
steroid| 🟢 Local only | 🔵 Connected |
|---|---|
| Conversation-memory recall | All features of 'Local Only' |
| Cross-IDE context | Just-in-time tool calls from the MCP hub |
| Auto-synced chat history | Deterministic workflow automation |
| Local indexing; recall inference uses your agent | Cloud marketplace and workflow execution |
Then follow the section for the mode you picked below.
Local-Only Mode
No Steroid account or connection string is required. History storage and indexing are local and LLM-free. Answering recall selects relevant nodes and synthesizes transcript excerpts through an installed agent CLI, whose configured provider may receive those prompts. Full-turn and diff retrieval do not use inference.
- Run
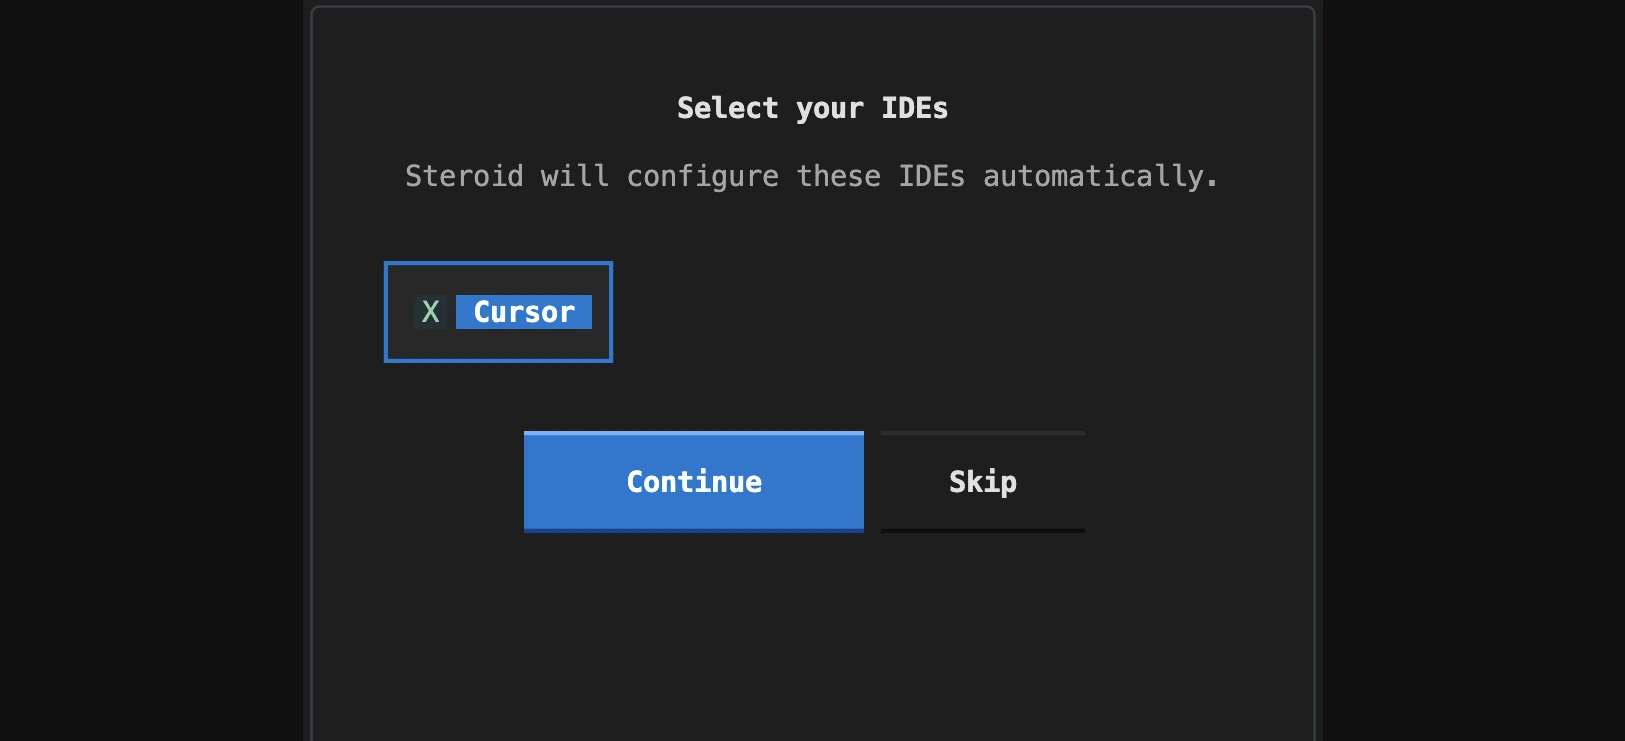
steroid. At “How should Steroid run?” choose Local only and click Continue. - On Select your IDEs, check the IDEs you use — Claude Code, Cursor, Codex, GitHub Copilot — then click Continue. Steroid writes each IDE's MCP config, installs its slash-command skills, and turns on background sync automatically.
- Steroid verifies each IDE. If a step fails, follow the on-screen guidance and click Retry; when everything passes you see the success screen.
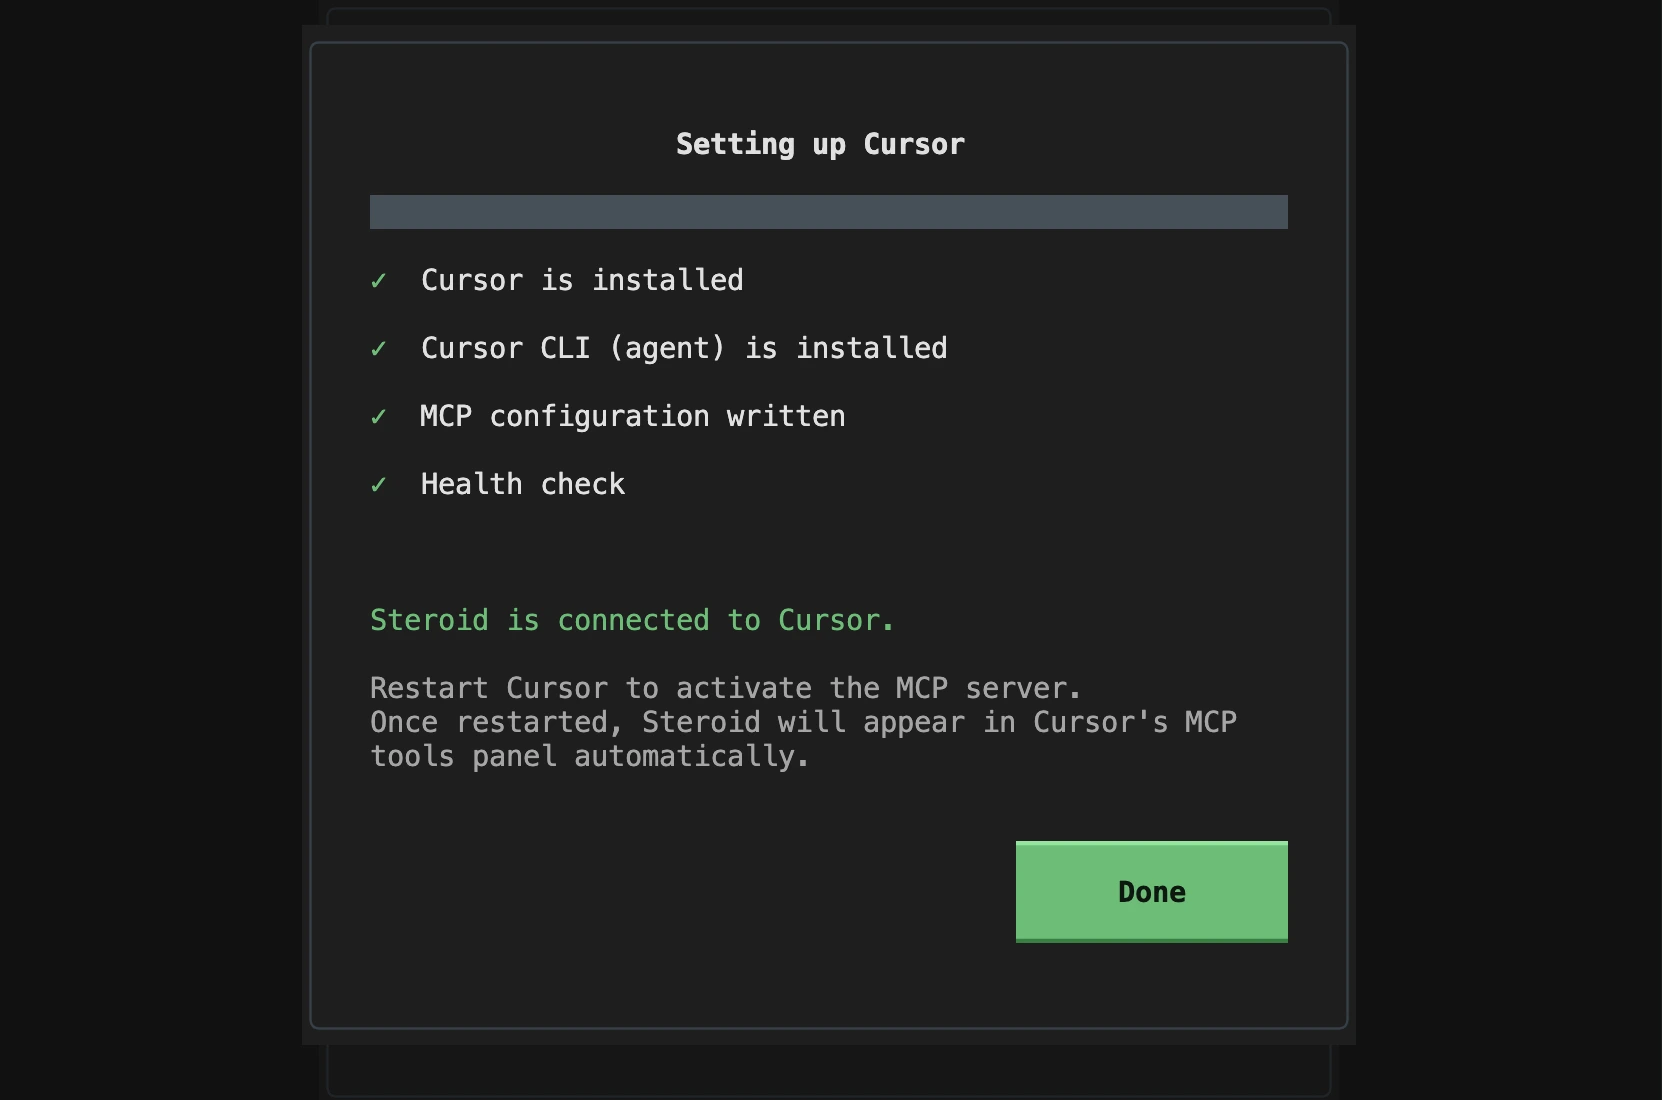
- Click Done and you land on Home — no connection string needed. Restart your IDE to activate the MCP server.
- Index a project and start recalling: run
steroid project initin the repo, then asksteroid memory ask "how did we handle X?"or use/steroid-recallinside your IDE.
TIP
Register/index a project with existing history; IDE setup alone does not create past conversations. To unlock the tool marketplace and workflows later, switch to Connected from Settings — your recall and projects are untouched.
Connected Mode
Everything in Local, plus the server-backed layer — the MCP tool marketplace, workflow automation (Flows), and the encrypted secrets vault. This mode needs an account and a connection string (internet required).
- Go to steroidkit.com/dashboard and log in or register. In the CONNECTION STRING section, copy your connection string (first visit: copy it directly; later: generate a new key and copy it).
- Run
steroid. At “How should Steroid run?” choose Connected and click Continue. - On Select your IDEs, check the IDEs you use and click Continue. Steroid configures each one (MCP config, skills, and background sync) automatically.
- At “Paste your connection string to enable Flows” (step 3 of 3), paste the string you copied and click Connect. You can Skip for now and connect later from Home or Settings.
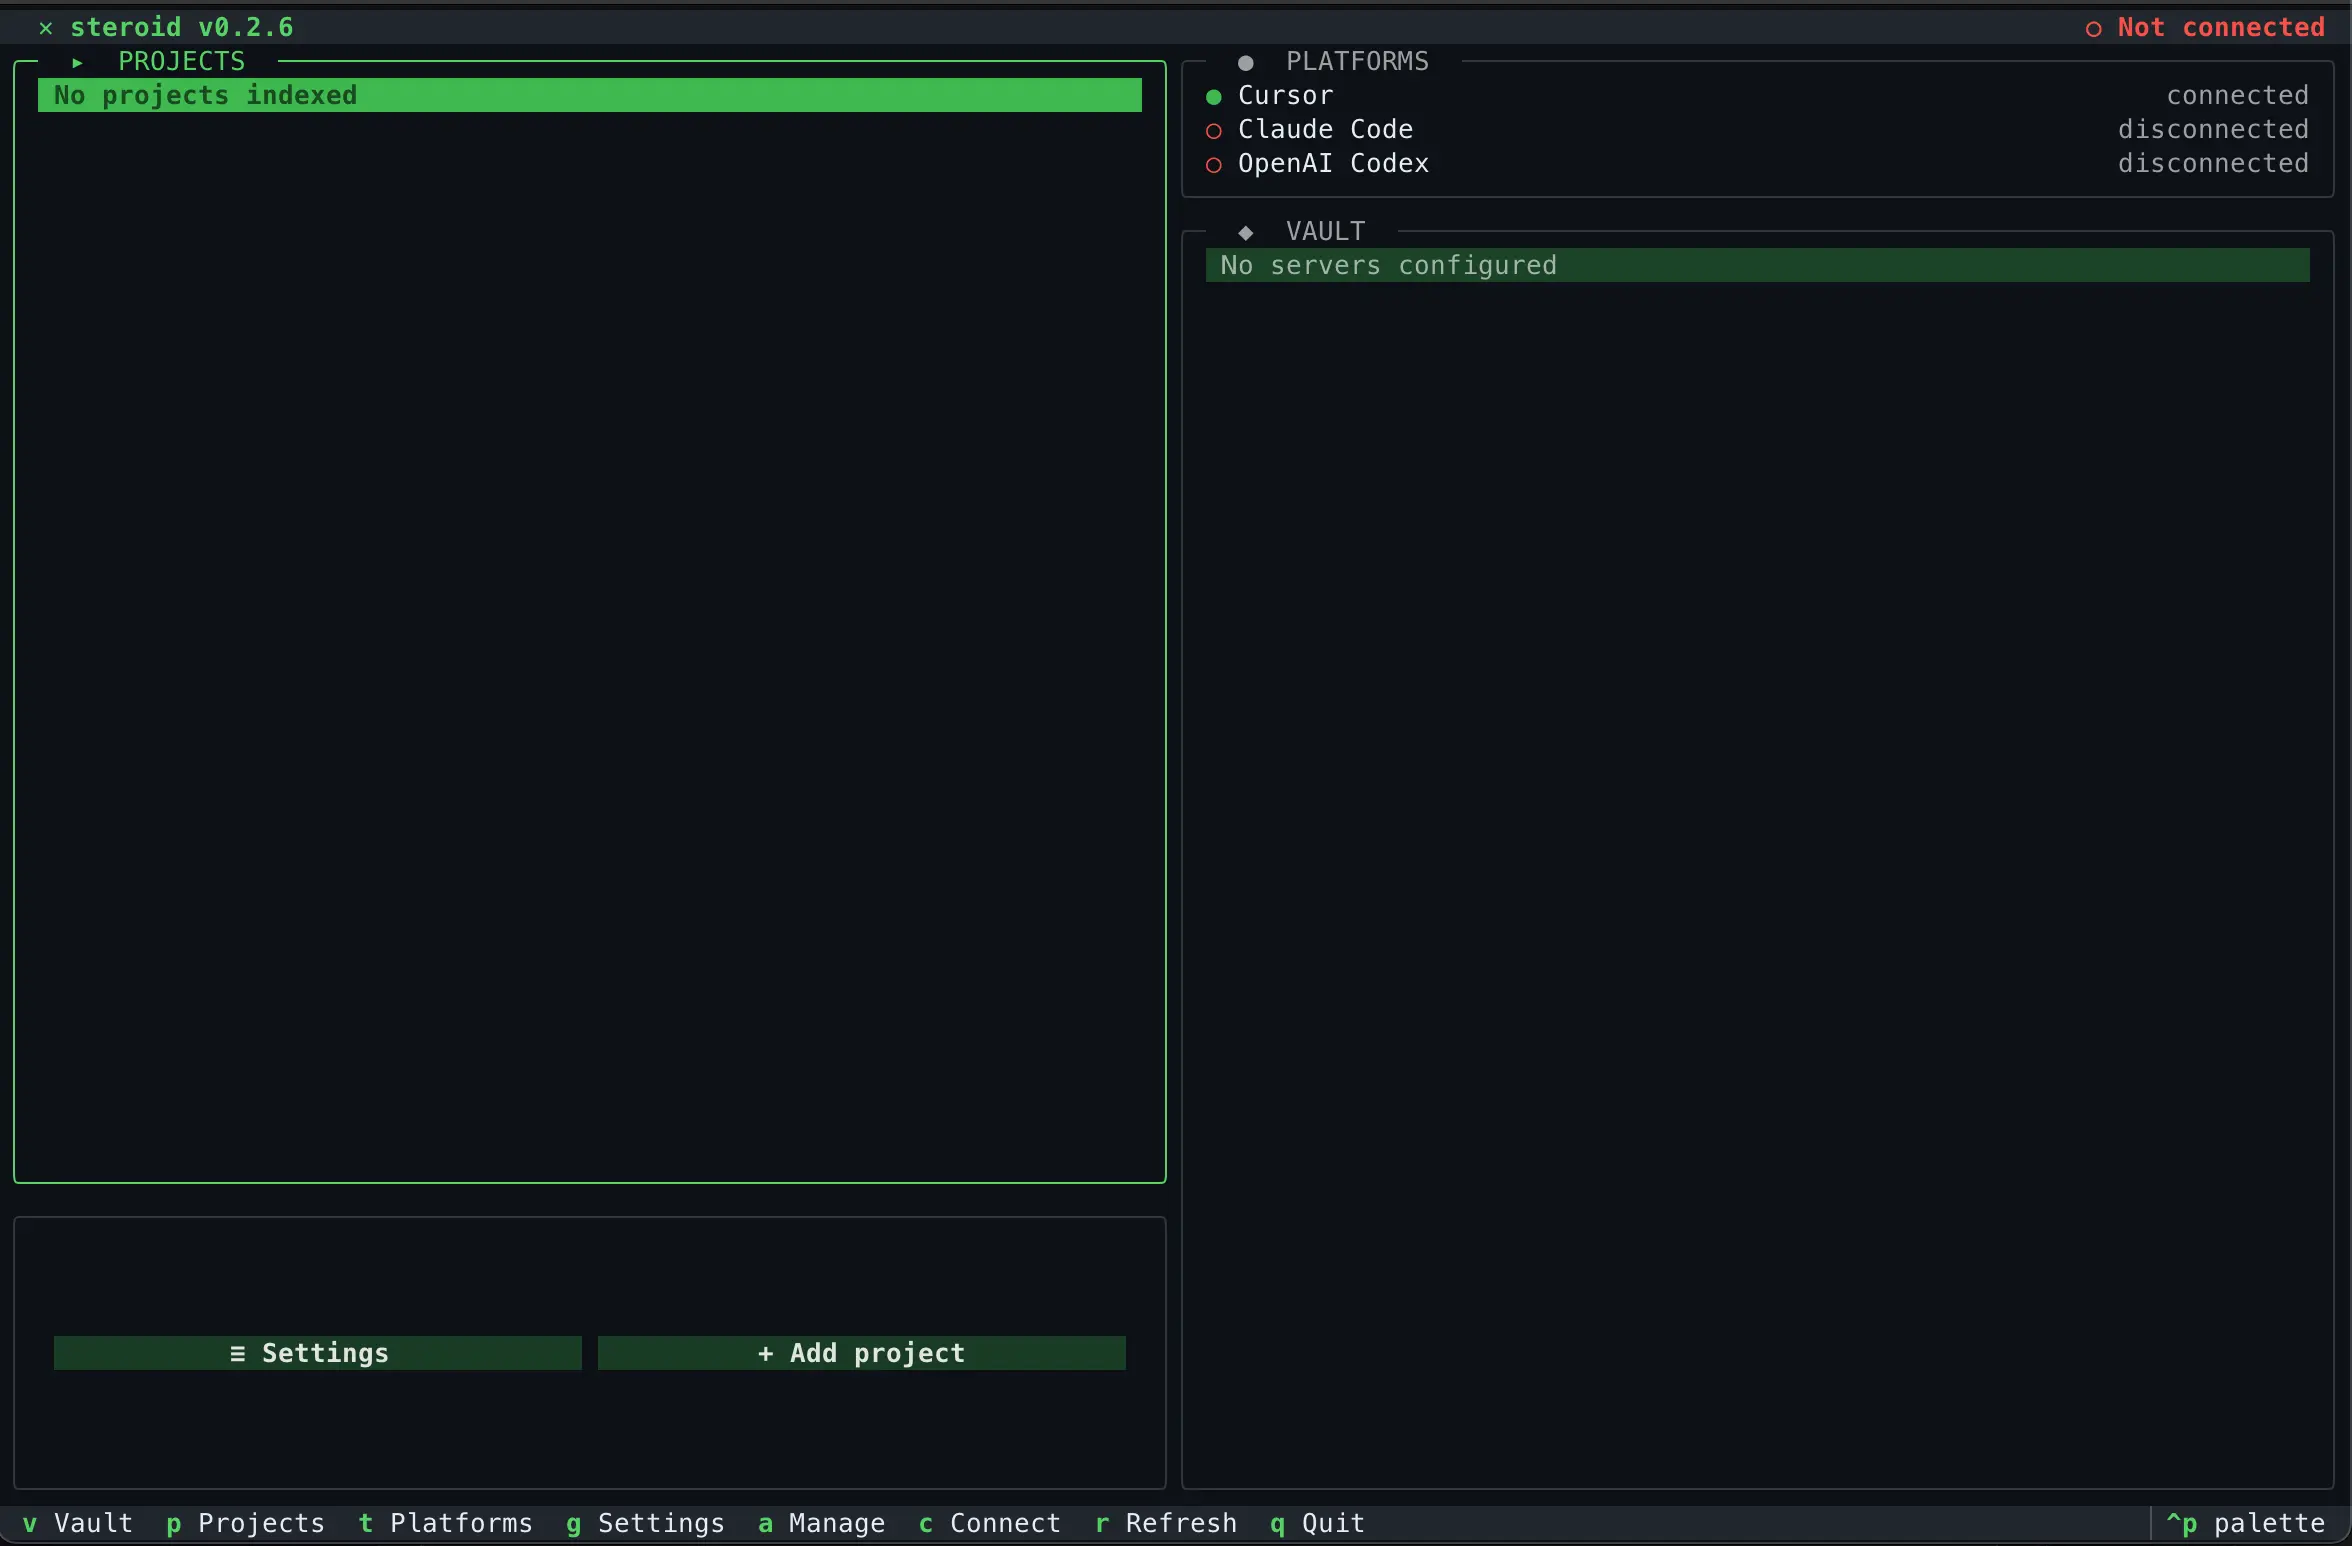
- You land on Home with the vault and Flows enabled. Restart your IDE — the marketplace (
search_tools/run_tool) and workflow tools are now available.
Manual MCP fallback
To confirm the connection, open your IDE's MCP settings (in Cursor: Settings > Tools & MCP) — Steroid should show a green indicator. If it shows red, paste the following JSON into mcp.json manually as per your OS:
macOS — ~/.cursor/mcp.json
json
{
  "mcpServers": {
    "steroid": {
      "command": "/Users/<username>/.steroid/bin/steroid",
      "args": ["mcp-server"]
    }
  }
}
Linux — ~/.cursor/mcp.json
json
{
  "mcpServers": {
    "steroid": {
      "command": "/home/<username>/.steroid/bin/steroid",
      "args": ["mcp-server"]
    }
  }
}
Windows — %APPDATA%\Cursor\mcp.json
json
{
  "mcpServers": {
    "steroid": {
      "command": "C:\\Users\\<username>\\.steroid\\bin\\steroid.exe",
      "args": ["mcp-server"]
    }
  }
}
The setup is now complete. The sections below are for you to explore the features.
Your First Tool Call
Open a chat in agent mode in Cursor and enter the following query:
Example prompt
get the cheapest flight from Delhi to London for travelling on 1st May using steroidNOTE
Explicitly naming Steroid helps the agent select its tools when other MCP servers are configured. Results depend on catalog availability, credentials and the external service; this is not a guaranteed flight-search benchmark.
You should get an experience like the following:
Steroid MCP demo — looped
Refer to the Steroid MCP docs for more details.
Your First Flow
Create flows through the builder, an imported JSON template, or the connected agent tools:
- Using the UI flow builder by clicking NEW FLOW and starting from scratch
- Importing an existing flow via a JSON file
- Asking
steroid-create-workflowto plan, test, repair and publish a flow after your approval
To get started quickly we will go with importing an existing flow. Create a JSON file on your system and paste the following content into it. This starter uses Cursor/auto as example selections; after importing, choose an IDE and model that your connected daemon actually advertises before testing or publishing.
Steroid Flows Hands-on.json
{
  "name": "Steroid Flows Hands-on",
  "type": "SHARED",
  "summary": "",
  "description": "",
  "tags": [],
  "author": "Aashish -",
  "categories": [],
  "pieces": [
    "@activepieces/piece-webhook",
    "@activepieces/piece-invoke-llm"
  ],
  "status": "PUBLISHED",
  "blogUrl": "",
  "metadata": {
    "externalId": "6WkTh3i4htfUW2XtdGRnz"
  },
  "flows": [
    {
      "displayName": "Steroid Flows Hands-on",
      "trigger": {
        "name": "trigger",
        "valid": true,
        "displayName": "Catch Webhook",
        "type": "PIECE_TRIGGER",
        "settings": {
          "propertySettings": {
            "authType": { "type": "MANUAL" },
            "authFields": { "type": "MANUAL", "schema": {} },
            "liveMarkdown": { "type": "MANUAL" },
            "syncMarkdown": { "type": "MANUAL" },
            "testMarkdown": { "type": "MANUAL" }
          },
          "pieceName": "@activepieces/piece-webhook",
          "pieceVersion": "0.1.26",
          "input": { "authType": "none", "authFields": {} },
          "sampleData": {},
          "triggerName": "catch_webhook"
        },
        "nextAction": {
          "name": "step_1",
          "skip": false,
          "type": "PIECE",
          "valid": true,
          "settings": {
            "input": { "ide": "cursor", "model": "auto", "prompt": "{{trigger.body.prompt}}" },
            "pieceName": "@activepieces/piece-invoke-llm",
            "actionName": "invoke_llm",
            "sampleData": {},
            "pieceVersion": "0.0.1",
            "propertySettings": {
              "_note": { "type": "MANUAL" },
              "ide": { "type": "MANUAL" },
              "model": { "type": "MANUAL" },
              "prompt": { "type": "MANUAL" },
              "_cursor_notes": { "type": "MANUAL", "schema": {} }
            },
            "errorHandlingOptions": {
              "retryOnFailure": { "value": false },
              "continueOnFailure": { "value": false }
            }
          },
          "nextAction": {
            "name": "step_2",
            "skip": false,
            "type": "PIECE",
            "valid": true,
            "settings": {
              "input": {
                "fields": {
                  "body": { "llm_result": "{{step_1}}" },
                  "status": 200,
                  "headers": {}
                },
                "respond": "stop",
                "responseType": "json"
              },
              "pieceName": "@activepieces/piece-webhook",
              "actionName": "return_response",
              "sampleData": {},
              "pieceVersion": "0.1.26",
              "propertySettings": {
                "fields": {
                  "type": "MANUAL",
                  "schema": {
                    "body": { "type": "JSON", "required": true, "displayName": "JSON Body" },
                    "status": { "type": "NUMBER", "required": false, "displayName": "Status", "defaultValue": 200 },
                    "headers": { "type": "OBJECT", "required": false, "displayName": "Headers" }
                  }
                },
                "respond": { "type": "MANUAL" },
                "responseType": { "type": "MANUAL" }
              },
              "errorHandlingOptions": {
                "retryOnFailure": { "value": false },
                "continueOnFailure": { "value": false }
              }
            },
            "displayName": "Return Response"
          },
          "displayName": "Invoke LLM"
        }
      },
      "valid": true,
      "schemaVersion": "16",
      "notes": []
    }
  ]
}- Go to steroidkit.com/dashboard and click the 01_FLOWS tab in the left navigation drawer. You will land on your flows dashboard.
- Click the Import button (to the left of NEW FLOW), then click Select a file, select the file you just saved, and proceed. You will see a view like the following:
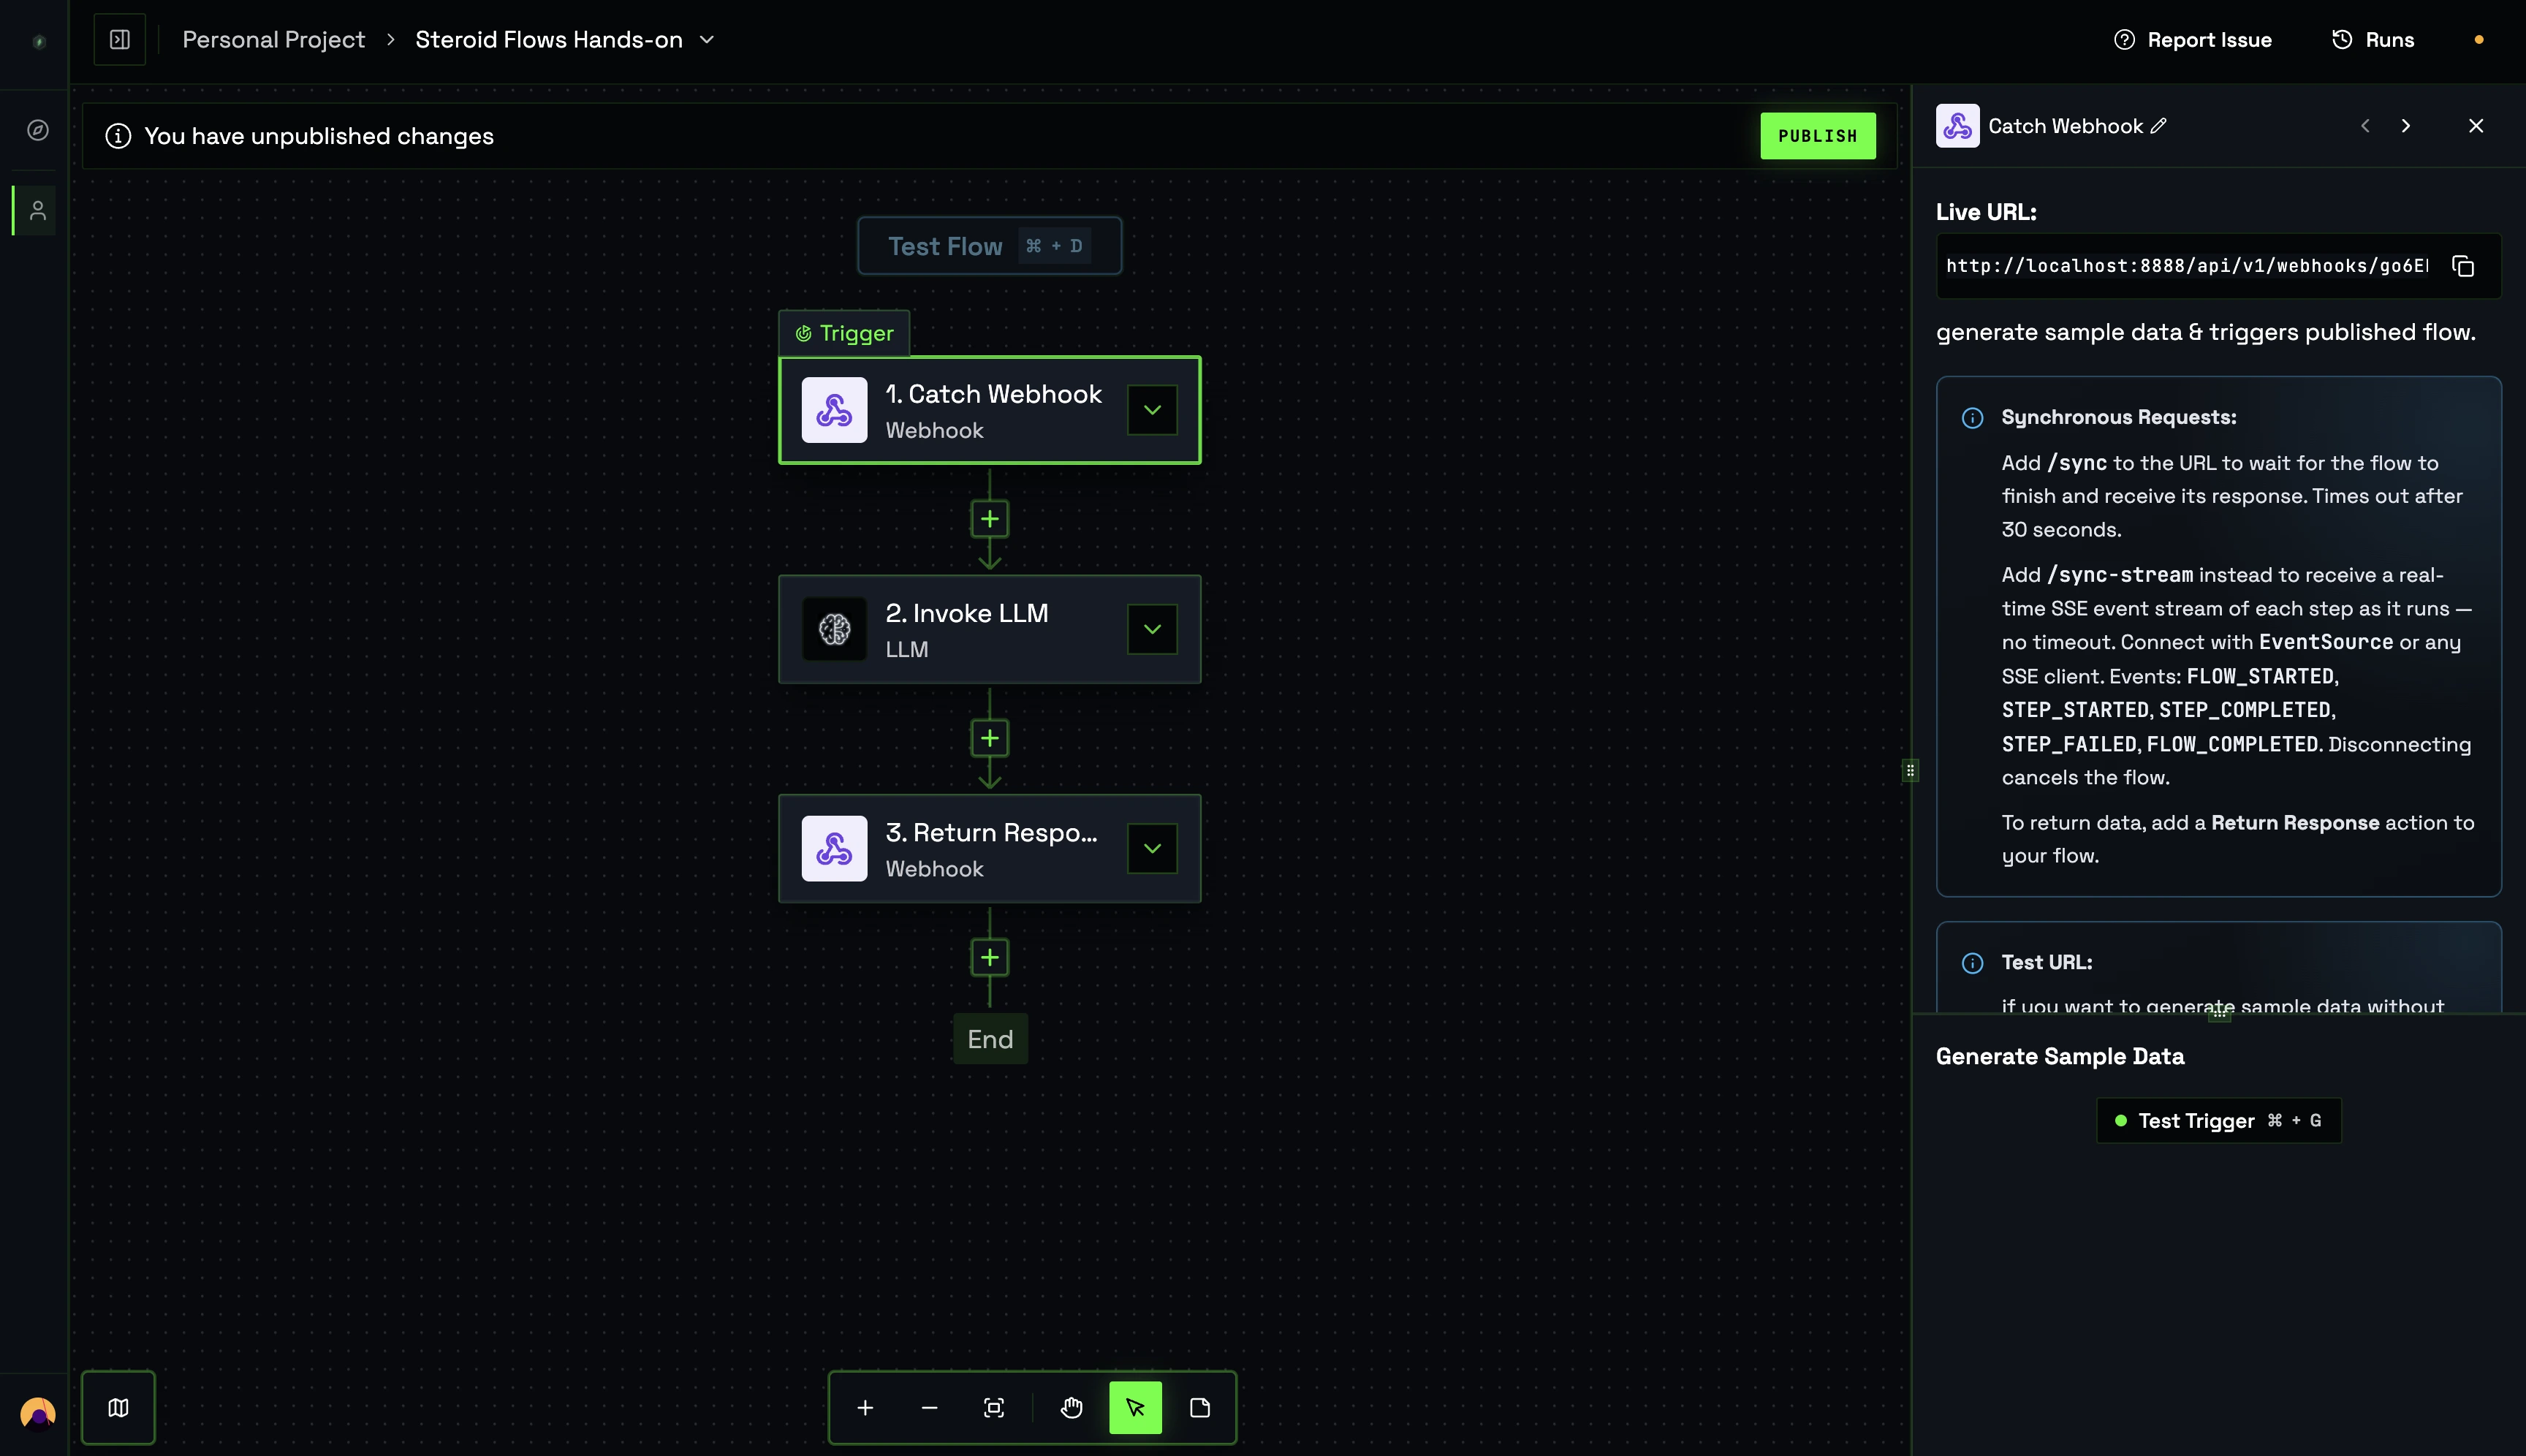
- Open the Invoke LLM step and select an advertised IDE and Model. The selected agent must be installed, authenticated and available through a connected daemon.
- In the right pane you will see the LiveURL — copy it and keep it with you.
- Click the Publish button, add a description, and enter
{}in the Trigger body schema field. Note: the{}visible by default is placeholder text — enter it manually. Then click Proceed.
Your flow is now ready. It:
- Takes a JSON body as input
- Uses
trigger.body.promptwith the IDE/model you selected - Returns the complete Invoke LLM step wrapper as
llm_result:
Response body
{
  "llm_result": {
    "success": true,
    "output": "<agent response body>",
    "executionTime": 0
  }
}
The base Live URL is asynchronous. Append /sync for the HTTP response body or /sync-stream for SSE events. The response above is schematic: output depends on the agent, and executionTime is a timestamp. LLM steps need an eligible connected client; with multiple machines FCC selects an eligible alive poller. Provider authentication, quota and timeout failures remain possible.
Testing your flow
Open a terminal and run the following curl command:
Terminal
curl -N -s -X POST "{LiveURL_you_copied}/sync-stream" \
     -H "Content-Type: application/json" \
     -d '{"prompt":"Hello"}'
A schematic SSE sequence follows. Parse FLOW_COMPLETED.response.body for the returned body; do not call response.json() on the whole stream. Use safe test inputs because flow tests and repair reruns can execute real integrations.
SSE output
data: {"type":"FLOW_STARTED","runId":"your_run_id","timestamp":"step_call_timestamp"}

data: {"runId":"your_run_id","stepName":"step_1","type":"STEP_STARTED","timestamp":"step_call_timestamp"}

data: {"runId":"your_run_id","stepName":"step_1","type":"STEP_COMPLETED","timestamp":"step_call_timestamp"}

data: {"runId":"your_run_id","stepName":"step_2","type":"STEP_STARTED","timestamp":"step_call_timestamp"}

data: {"type":"FLOW_COMPLETED","response":{"status":200,"body":{"llm_result":{"success":true,"output":{},"executionTime":0}},"headers":{}},"timestamp":"step_call_timestamp"}
For more information, read the Steroid Flows docs.
Next Steps
Now that your environment is set up, explore the rest of the Steroid documentation:
| I want to… | Go to |
|---|---|
| Understand how 200+ servers are surfaced through 2 tools | Steroid MCP — Overview |
| Understand discovered-tool eligibility and its limits | Hallucination Prevention |
| See discovery and execution contracts | Marketplace search/run |
| Browse all available integrations | Server Catalog |
| Build deterministic multi-step automations | Steroid Flows — Overview |